519-258-2333 · 1-888-310-6674

MNSi TV Technical Support

No matter when you need help our 24/7 technical support staff is here

Devices


Kamai 500

Download User Guide

HD set-top box to watch MNSi TV.

Kamai 650M

Download User Guide

HD set-top box to watch MNSi TV.

Amulet 5

Download User Guide

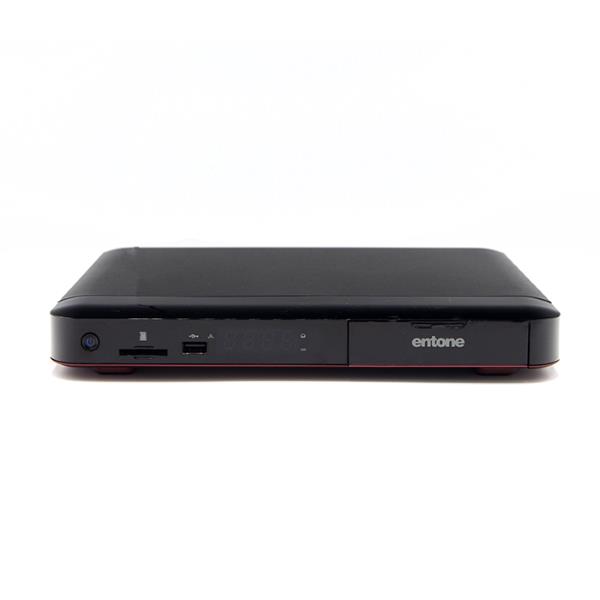
HD PVR to watch MNSi TV. This is an upgrade from the default set-top box that allows you to record shows to watch later.

URC 4 US Remote

Download User Guide

Universal remote to control your set-top box. Can be programmed to control your TV and other devices. This remote comes with the Kamai 500 and the Amulet 5.

Nova Remote

Download User Guide

Universal remote to control your set-top box. Can be programmed to control your TV and other devices. This remote comes with the Kamai 650M

FAQ


Basic Troubleshooting

Checking Connections

A loose or faulty cable may cause issues when watching TV. Please check for the following:

  • Cables that are not inserted all the way
  • Damaged or frayed cables
  • AV cables near transformers or power adapters
  • Only use power adapters supplied with the device. If it is damaged contact support. Using other power adapters may damage the device.

If you need assistance, please contact support.

Checking Inputs

If you have a television with multiple inputs make sure you have the correct input selected. Check the user manual of your television for more details.

If you have a receiver that can accept multiple video/audio inputs please ensure the following:

  • Make sure your television is on the correct input
  • Make sure your receiver is on the correct video input
  • If you are using the optical or S/PDIF out from the set-top box, make sure that input is also selected on the receiver

Refer to your receiver's manual for more details.

If you need assistance, please contact support.

Audio

If you do not hear any sound, check the volume level on the TV, receiver, and set-top box. Also check to see if either the TV, receiver, or set-box is muted.

When using digital audio make sure your TV or receiver supports AC3

Basic Usage

Navigating Channels

  • Press CH/PG and CH/PG to switch channels
  • Press buttons on the number pad then OK to switch to a channel directly
  • Press / arrow key to preview channels while staying on the current channel. Press OK to switch.
  • While in preview mode after pressing the / arrow keys, you can press and arrow keys to preview upcoming programming
  • While in preview mode you can press the EXIT button to return to viewing the current channel
  • Pressing OK while viewing a channel shows a menu to record or show expanded information on the current channel
  • Press the LAST button to switch to the last viewed channel. Pressing LAST again will return you back.
  • Pressing the INFO button will show the current channel information. Pressing it a second time will also show upcoming programming. Pressing it a third time will close the information panel.

Other Functions

  • Pressing the OPTIONS button once shows a menu to change the aspect ratio. Use the and arrow keys to change the selection then press OK to confirm.
    • WIDE will display the picture in a wide screen format.
    • ZOOM will try to fill the display while maintaining the content's aspect ratio but may obscure some vertical and horizontal parts of the picture
    • CROP will try to fit the image to the current display and "chop off" the rest
    • LETTERBOX will show top and bottom black bars. Useful for movies that have a wider aspect ratio if you want to keep cinematic feel without stretching the picture.
    • SQUEEZE will try to fill the screen and ignore aspect ratio. May result in stretched picture
    • PILLAR will show black bars on the left and right. Useful for older content in the 4:3 aspect ratio
  • Pressing the OPTIONS button twice will show the audio/language selection menu. Available audio types and languages depend on the channel. Use the and arrow keys to change the selection then press OK to confirm.
  • Pressing the OPTIONS button three times will show the closed caption menu. Use the and arrow keys to change the selection then press OK to confirm. You can also used the dedicated closed caption button to cycle through the different options.
  • Pressing the red shortcut button will bring up the DVR Menu

If you need assistance, please contact support.

Using the Program Guide

  • Pressing the GUIDE button will bring up the program guide showing ALL channels. Subsequent presses will cycle through subscribed, SD, and HD, and then close the guide.
  • While in the guide menu you can press the and arrow keys to navigate one channel at a time.
  • While in the guide menu you can press the CH/PG and CH/PG to navigate one page at a time.
  • The and arrow keys allow you look at upcoming programming.
  • Pressing OK on the currently highlighted item in the NOW column will switch to that channel
  • Pressing OK on the currently highlighted item in any future column will bring up a menu where you can:
    • Schedule an Event
    • Record
    • Set Reminder - A reminder will show a notification on screen when the programming has started.
    • Set Autotune - Autotune will switch to a channel automatically when the programming has started
    • Show Expanded channel information

If you need assistance, please contact support.

PVR

The DVR Menu

To bring up the DVR Menu, press the red shortcut button on the remote or:

  • Press the MENU button
  • Using the left or right arrow keys select DVR then press OK

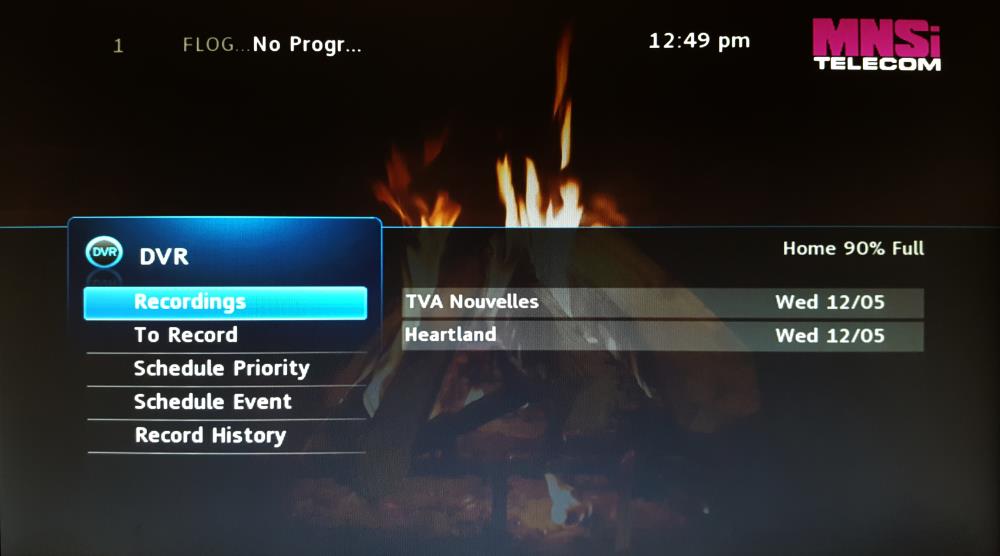
  • Recordings will show all past and current recordings on the device and on your Whole Home PVR setup
    • A red circle next to a recording indicates that a program is either currently being recorded or scheduled to be recorded
    • A folder next to an item indicates there are multiple recordings a program (ie different episodes)
  • To Record will show all upcoming recordings
  • Schedule Priority will show all planned series recordings and all planned advanced recordings
  • Scheduled Events Press OK to show the advanced recording/event menu
  • Record History will show previous successful/failed recording attempts

Basic Recording

Create a simple recording
  • While viewing a channel press the REC button
  • The recording will start immediately
  • Press the REC button again (while on the same channel) to stop the recording
View Recordings
  • Bring up the DVR Menu
  • Select Recordings with the arrow keys then press OK
  • Select the desired recorded program with the arrow keys then press OK
    • If there is a folder icon next to the name of the recording, press OK to enter the folder. The folder will show for programs with the same name (TV shows like The Simpson's for example)
  • Select Play or Resume with the arrow keys then press OK

Recording Upcoming Programming

  • Bring up the GUIDE MENU
  • Using the arrow keys select an upcoming program, show or movie
  • Press OK to bring up the menu
  • Using the arrow keys select RECORD PROGRAM then press OK
  • You will be returned to the GUIDE MENU and a recording indicator should be present next to the program name.

You can record up to a maximum of 3 programs simultaneously. If you try to record more a menu will appear where you can cancel or choose a previously scheduled recording to replace it with the new one.

To show a listing of all upcoming recordings bring up the DVR Menu and:

  • Select "To Record" with the arrow keys then press OK
  • Use the UP/DOWN arrows keys to browse the list of upcoming recordings
Cancel an Upcoming Recording

Method 1:

  • Bring up the GUIDE MENU
  • Using the arrow keys, select a program that has a recording indicator on it (red circle) then press OK
  • In the menu displayed, use the arrow keys select to Cancel Recording then press OK
  • In the confirmation menu displayed, use the arrow keys to select Yes then press OK
  • The recording is now canceled and the recording indicator should no longer be present

Method 2:

  • Bring up the DVR Menu
  • Using the arrow keys select To Record then press OK
  • Using the arrow keys select the recording you want to cancel then press OK
  • In the menu displayed, use the arrow keys select to Cancel Recording then press OK
  • In the confirmation menu displayed, use the arrow keys to select Yes then press OK
  • The recording should now be canceled

Recording a Series

Setup the Recording Schedule
  • Bring up the guide menu
  • Using the arrow keys select an upcoming series program then press OK
  • using the arrow keys select Record Series then press OK

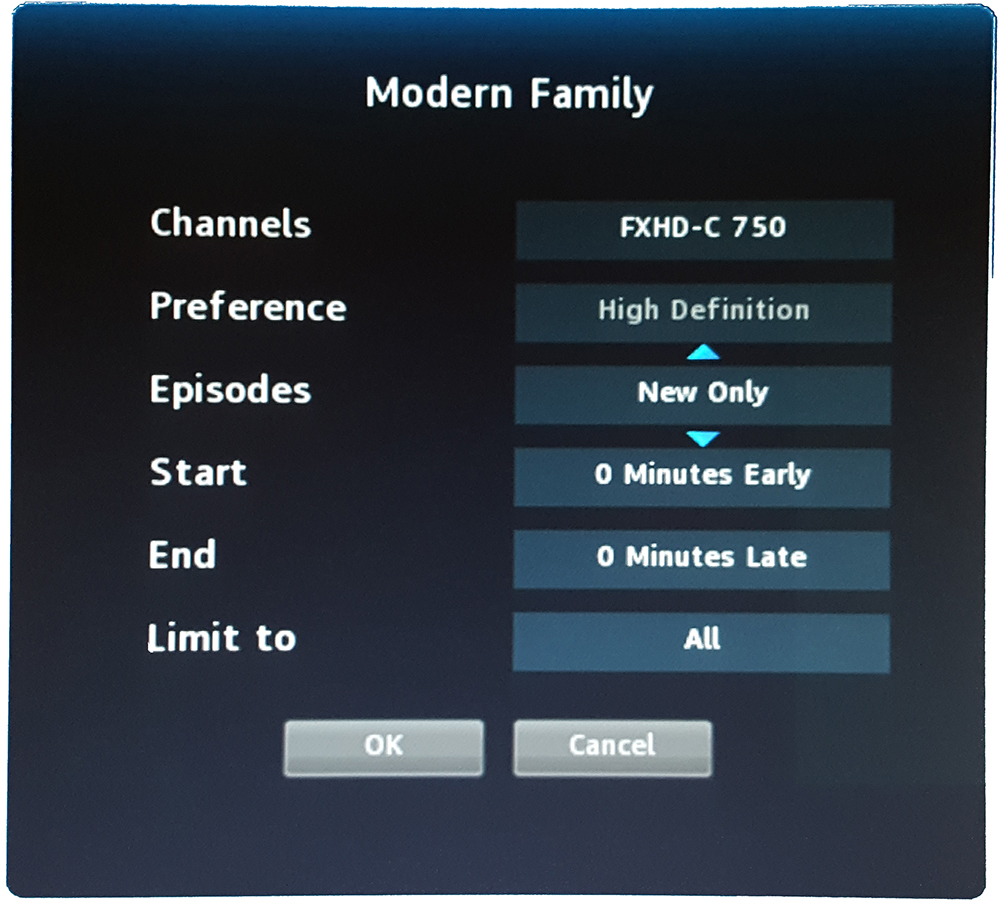
In the record series menu you can change what chanel is used (don't change this unless you are manually setting up a schedule), what type of episodes to record (All/New Only), a start and end offset (ie 5 minutes before and after) and a limit of the number of recordings (ALL, 1, 5, or 10 episodes)

To change one of the options you:

  • Use the arrow keys to select the option you want to change
  • Press the OK button on the remote to activate the option's edit mode
  • Use the arrow keys to change the option's value
  • Press the OK button on the remote to commit the option's new value and leave edit mode

Once you are satisfied with the setup use the arrow keys to select OK on the screen then press OK on the remote. The series is now setup to be recorded. You can review and edit changes in the DVR Menu. When in the guide menu you will see the program with the recording symbol and a plus sign in a red circle.

Modify/Remove Series Recording
  • Open the DVR Menu
  • Select Schedule Priority then press OK
  • Select recording schedule you want to modify then press OK
  • To Cancel:
    • Select Cancel Series Recording then press OK
    • In the confirmation menu select Yes then press OK
  • To Edit:
    • Select Edit Series Recording then press OK
    • A similar menu to the creation method will appear. Make your adjustment as needed. See "Setup the Recording Schedule" for detail on how to change the options.

Advanced Recording Scheduling

You can create a advanced custom schedule to record a channel at a certain time of the day.

  • Bring up the DVR Menu
  • Use the arrow keys to select "Schedule Event" and press OK

The Schedule Event Menu should now be displayed.


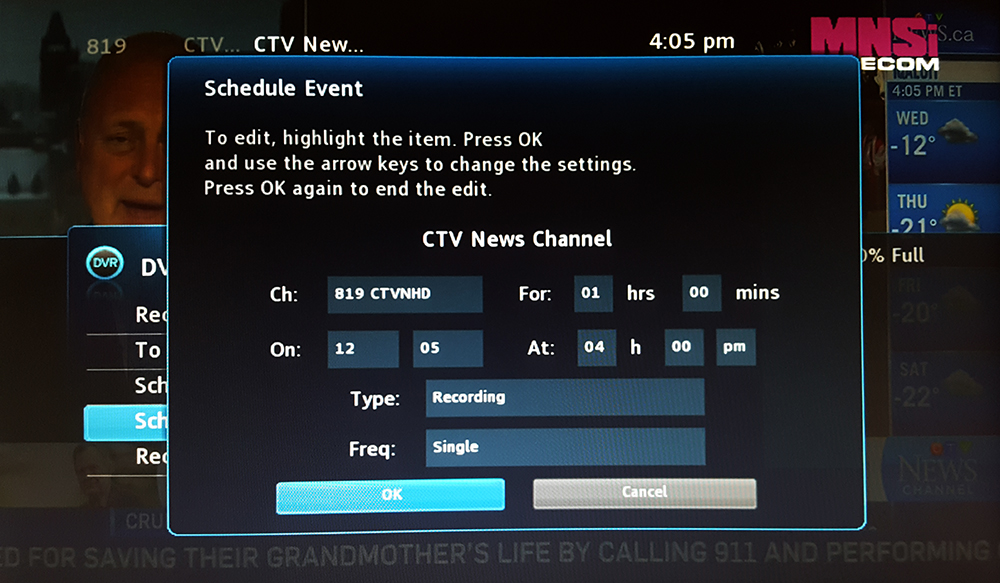
  • Ch: The channel to record
  • On: The start date of the event
  • For: The duration to record for
  • AT: The start time of the event
  • Type: (Recording, Reminder, Autotune)
  • Freq: The frequency to record
    • Single: Just once at the time specified
    • Weekly: Once a week on the day the event was created at the time specified. (ie if you create for a Monday, the recording will happen every Monday at the time specified)
    • M-F: Monday through Friday at the time specified
    • Everyday: Everyday during the week at the time specified

To change one of the options you:

  • Use the arrow keys to select the option you want to change
  • Press the OK button on the remote to activate the option's edit mode
  • Use the arrow keys to change the option's value
  • Press the OK button on the remote to commit the option's new value

Once you are satisfied with the setup use the arrow keys to select OK on the screen then press OK on the remote. You can review and edit changes in the DVR Menu in the Scheduled Priority section. The edit menu is the same as the creation menu.

Whole Home PVR

With Whole Home PVR, all set-top boxes can access recording features. The PVR box acts as the brain of the Whole Home PVR. For example you could have a PVR box in the living room and a HD box in the bedroom. The HD box in the bedroom will be able to access the recording features of the PVR box.

When you start a recording on a regular HD box in a Whole Home PVR system, it instructs the PVR box to perform the recordings. It also acts as the storage device for all recordings. When you watch a recording on a regular HD box, it streams the content from the PVR box.

The simultaneous recording limit is applied to the whole system and not per device.


If there is anything not covered on this page feel free to contact support for assistance