MNSi Technical Support - Phone Service
No matter when you need help our 24/7 technical support staff is here
-
1
Home Phone Help Document
- 1.1 Long Distance
- 1.2 Voice Mail
- 1.3 Call Waiting
- 1.4 Caller ID
- 1.5 Star Codes
- 1.6 Phone Service
- 1.7 Web Interface
Home Phone Bundle Help Document
Thank you for taking advantage of the MNSi Home Phone Bundle. This service combines residential local telephone, long distance, and Internet services. Our phone service is the common POTS (Plain Old Telephone Service) provided by your traditional local phone company.
Long Distance
You can verify you are dialing from an MNSi line by calling the long distance verification number:1-700-555-4141. Area codes 800, 833, 844, 855, 866, 877, and 888 are toll free numbers and don't count as long distance, example: 1-800-668-6878
International calling and long distance calling can be enabled or disabled by checkbox in http://myphone.mnsi.net . International calls are prefixed with 011, while long distance calls are prefixed with 1.
Your long distance service comes with 250 minutes per month for calls within the US or Canada. 5 cents a minute will be charged after 250 minutes are depleted. To see how many long distance minutes you have left in the current month, please call customer service. For rates on international calling please visit Residential Services - Extras
Notice: Calling Long Distance does not require a 1 in front of the area code. There will be a voice saying the call is long distance and then the call will be completed.
Additional information can be found here: Residential Services - Extras
Voice Mail
A pulsed dial tone or flashing mail light (MWI) on your telephone handset will indicate someone has left a new voice mail message waiting for you.
You can access voice mail by dialing * 9 8 from home or by web address http://myphone.mnsi.net . If checking remotely dial the local number:
- 519-789-9999 London
- 226-671-9999 Chatham
- 226-672-9999 Sarnia
- 226-673-9999 Kitchener
- 226-674-9999 Windsor
After dialing your local number, press * to enter your phone number, wait, and then enter your numerical phone password (PIN) followed by #.
The longest message that can be left is 3 minutes per voice mail message. To change the number of seconds before your caller is sent to voice mail, please see the web interface. You can also have the voice mail system email you the message. See web interface for more information.
If you are not sure what your password is please contact customer service between regular business hours.
Once you are logged into your phone service the following menu will help you navigate to the options you are looking for.
- 1 Messages
-
1 Get new voice mail
- 1 Repeat
- 2 Save as new
- 3 Delete message
- 4 Make a direct call
- 5 Send a copy
- 6 Increase volume by 1
- 7 Decrease message speed
- 8 Pause the system either during message listing or message play
- 9 Increase message speed
- 1 1 Skip to previous message / # skip ahead one message
- 7 7 Skip back 5 seconds
- 9 9 Skip forward 5 seconds
-
1 Get new voice mail
- 2 Send message
-
3 Greetings
-
1 Personal greeting setup
- 1 Re-record / enable
- 2 Record personal greeting
-
3 Select system generated greeting / change recording of name
- 1 Choose type of system greeting
- 2 Re-record name
-
5 Greetings callers hear when busy
- 1 Enable / disable
- 2 Review /re-record
-
1 Personal greeting setup
-
4 Change settings
-
1 Group list
- 1 To add a new group list
-
2 Hands free / time saver option
-
1 Autoplay settings
- 1 Turn voice mail autoplay on
- 3 Turn fax autoplay on
- 2 Settings for urgent messages
-
3 Voice mail preferences
-
1 Voice mail headers
- 1 Turn off the playing of voice mail headers
-
2 Voice mail body
- 1 Turn off the playing of voice mail bodies
-
1 Voice mail headers
-
1 Autoplay settings
-
1 Group list
-
3 Security
- 1 Change pin
-
2 Change fast login option
- 1 Change option to always enter your phone number from home
-
3 Change skip pin feature
- 1 Change the need to enter a pin
-
5 Notification options
- 1 Deactivate / Activate message waiting indicator
-
6 Additional settings
-
4 Broadcast options
- 1 Toggle marketing broadcasts
-
4 Broadcast options
-
6 Deleted messages
-
1 Voice mail
- 1 Repeat
- 2 Restore
- 3 Permanently delete
- 4 Reply
- 5 Send a copy
- # Get next message
-
1 Voice mail
- 7 Logout
- 0 Help menu
- * Go back one menu level
Call Waiting
Call waiting feature allows you to take a second incoming call while putting the first call on hold. By default this is enabled. The indicator beep will repeat evey 5 seconds for the duration of the second incoming call until it is answered, or until the call threshold limit is reached at which point the caller will be sent to voice mail (please see web interface for more information). To answer the call press the phone receiver for half a second and release, you will now be connected with the second line. You may have to set your home phone options to 600ms flash time or more in your handset. You can flash back and forth from callers
To disable call waiting from your phone press * 7 0 (before each call). Call waiting cannot be disabled through the web interface.
Caller ID
Your phone service comes with caller id. After the first ring, the caller's phone number and name, if available, will be sent to your caller ID enabled phone display. In reverse when you call out, if you'd like to withhold your Caller ID information dial * 6 7 before each call
If you are having trouble getting the caller ID information, please ensure that all devices connected to your phone number have the DSL filters at the wall for each device except the DSL modem. You also have the ability to see just phone number or name or both. See web interface for more info.
Your phone may have the ability to keep a log of calls. This ability is on by default at MNSi, please see the web interface for more information.
Caller ID information will also display Caller ID information during a call. This feature is called "Visual Call waiting" and currently is included in the MNSi home phone bundle.
Star Codes
If using a rotary phone or your phone uses a pulse signal instead of a tone, 1 1 will replace *. For example 1 1 9 8 pulse is * 9 8tone.
- Voicemail * 9 8
- Caller ID Presentation ( Present: * 8 2, Withhold: * 6 7 )
- Automatic Recall ( Activate: * 6 9, Return Key = 1, Deactivate: * 8 9 )
- Automatic Callback ( Activate: * 6 6, Deactivate: * 86 )
- Cancel Call Waiting * 7 0
Phone Service
Your phone service has unlimited local calling. To verify you are using MNSi phone service you can dial the repair number 611. If successful you will hear " Thank you for calling MNSi ". Press 2 for help from a live operator. Your phone number is automatically added to the phonebook. To have an unlisted number a $4monthly fee is applicable, to change your phone number a $75 fee is applicable. Placing or receiving collect calls is not supported.
Web Interface
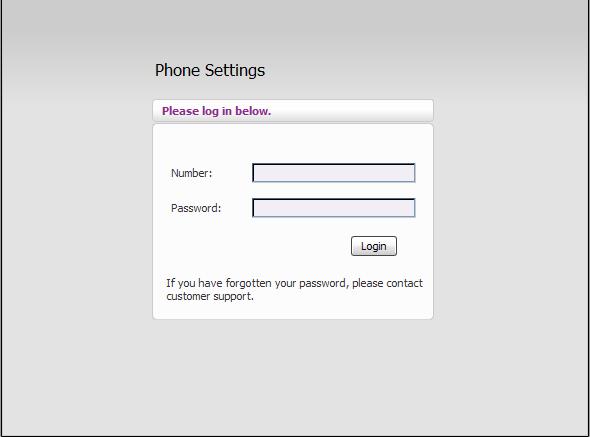
Web Interface Login
When visiting http://myphone.mnsi.net you will be asked for your home phone number (full 10 digits without dashes) and your selected password. This password may or may not be the same as your internet connection password.
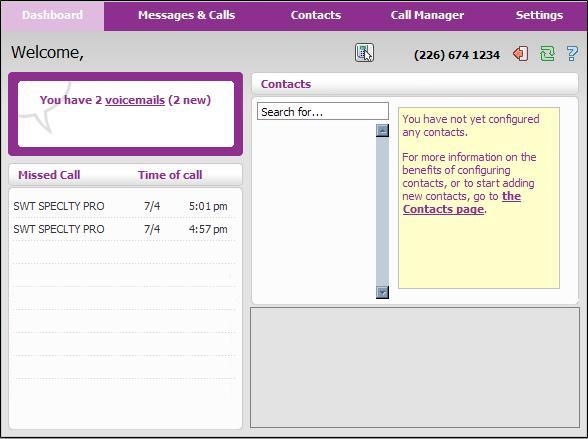
Once logged in you have several useful devices at your disposal. You will notice 5 main tabs to choose from at the top of the page: DASHBOARD; MESSAGES & CALLS; CONTACTS; CALL MANAGER and SETTINGS. You also have four buttons that are accessible on all tabs located near the top of the page. The dial button will allow you to dial a phone call through your computer's internet connection (once the number is dialed your phone will ring to indicate the call is going through). You will also see a help "?" button which will explain in detail all aspects of the tab you are currently viewing, a refresh button and a logout button.
Dashboard Tab
The dashboard tab welcomes you once you have successfully logged in and allows you to search your contacts that are in the system. The left side gives you a list of calls that have recently been missed as well as a voice mail indicator. If you have voice mail waiting for you, clicking the link will redirect you to the MESSAGES & CALLS tab...
Messages Tab
The MESSAGES tab will list any voice mail that is waiting for you, including the name/number and time of the call. You can listen to the voice mail through your computer's speakers by hitting the PLAY button at the far left side of the row. When you are finished you can click the DELETE option at the right side or keep it in the mailbox.
- FAXES tab shows any fax messages sent to your phone line.
- MISSED tab shows incoming calls that were unanswered.
- DIALED tab shows numbers that were dialed out from your phone line.
- RECEIVED tab shows all calls that have been dialed to your phone line.
- DELETED tab shows deleted voice mail messages that can be restored.
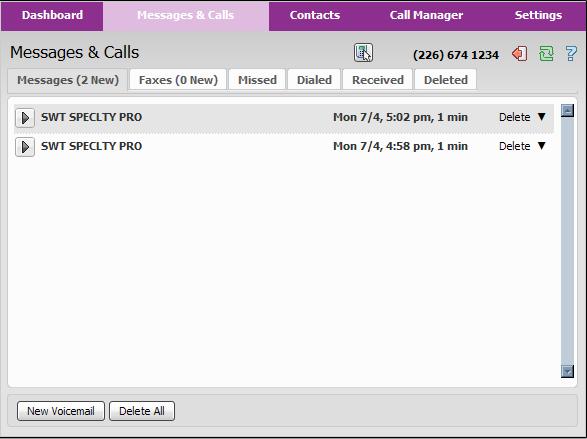
*Note: Information from each tab can be exported to a CSV (comma separated value) file on your computer for further reference.
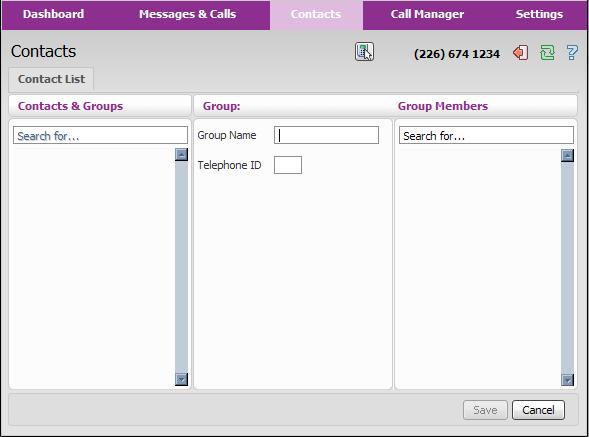
Contacts Tab
The contacts tab shows your personal list of phone contacts. You can add a contact manually. Each contact MUST have a phone number and a nickname entered. All other entries are optional. Once you enter the information, hit SAVE at the bottom of the screen to add the contact to your list. If a call comes in that matches a number in your contact list, the RECEIVED list will show the nickname entered for that contact as well as the phone number of the dialer.
You can import a contact list from any CSV file on your computer that has valid phone contact information. Simply hit import and BROWSE to the file you wish to import. you can also export your contact list to a CSV file, which can be used to incorporate into a compatible mail client such as Outlook and Outlook Express.
Call Manager reports a summary of how your phone will function, extra features like call forwarding, call screening and call rejection, if subscribed to will show their status here. See " Extra features " section for more info
There are several settings allowing you to personalize your phone service in the sub headings of the Settings category ie; email your voice mail messages, change password for web and phone prompts, toggle message waiting indication on or off, getting called when you have voice mail waiting and select different greetings.
Settings Tab
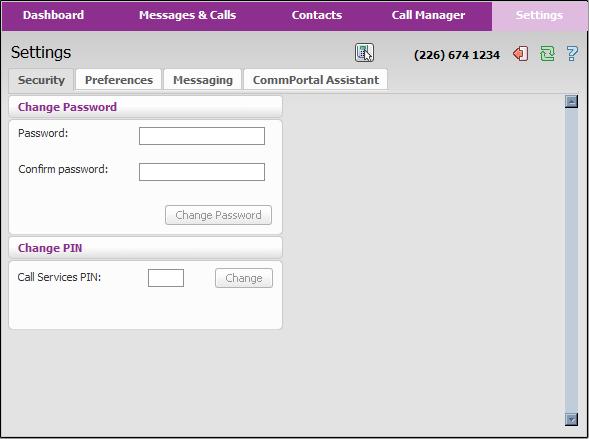
Security Sub-Tab
Allows you to change the password to log into your http://myphone.mnsi.net web account and also change the PIN number needed to access your voice mail over the phone via * 9 8 access.
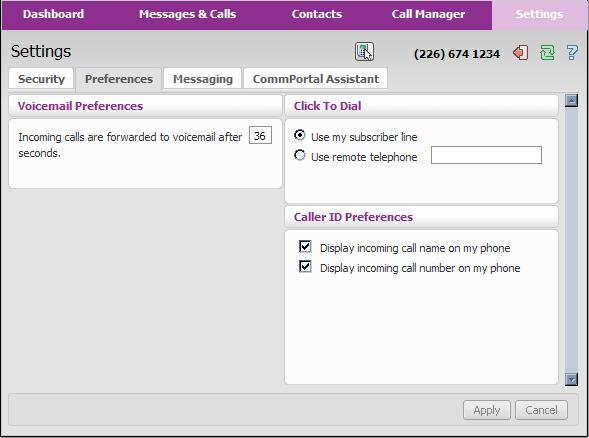
Preferences Sub-Tab
Customizes the number of seconds your phone will ring before your voice mail activates. Defaulted to 36 seconds.
- 60 seconds - 10 Rings
- 53 seconds - 9 Rings
- 46 seconds - 8 Rings
- 40 seconds - 7 Rings
- 36 seconds - 6 Rings
- 28 seconds - 5 Rings
- 20 seconds - 4 Rings
- 15 seconds - 3 Rings
- 10 seconds - 2 Rings
- 5 seconds - 1 Rings
CLICK TO DIAL function allows you type a phone number into the web page that you want to call. Once this is entered your phone will ring, when you pick up your phone the number that was entered in the web page will be dialed and start to ring.
You can can also choose what to see in your Caller ID info box, name, phone number or both. This action is also accessible by using feature access codes * 6 5 and * 8 5
The following sections explain messaging -- the web version of the phone menu from the beginning of this document. Settings, Mailbox, MWI, Outdial, Override, Greetings.
Messaging Tab
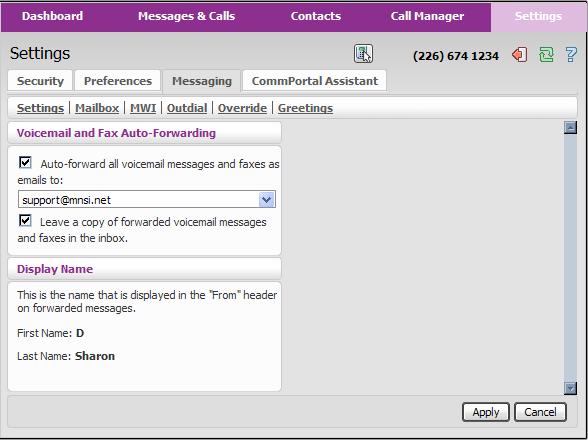
Settings
This next section in Settings > Messaging represents the phone menu:
Settings | Mailbox | MWI | Outdial | Override | Greetings
Settings: You can forward voice mail and faxes received to an email address. These will become attachments that can be opened by your computer (you will need working speakers to listen to voice mail messages on the computer). You may choose to keep a copy of the messages and faxes on your phone or delete them upon forwarding.
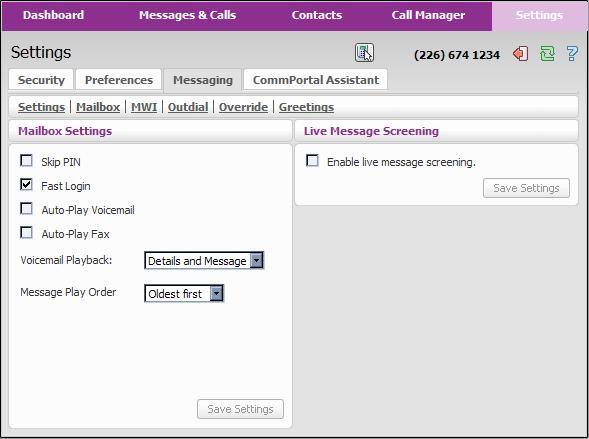
Mailbox
Here you can toggle how your mailbox delivery system will behave when you dial for your messages. You can disable your PIN, however anyone dialing * 9 8 from your phone will get your messages without being prompted for a password. LIVE SCREENING MESSAGES, when enabled will notify you with a special ring when voice mail is being left on your phone. You can pick up the phone to listen to that message as its being left without being heard by the incoming caller.
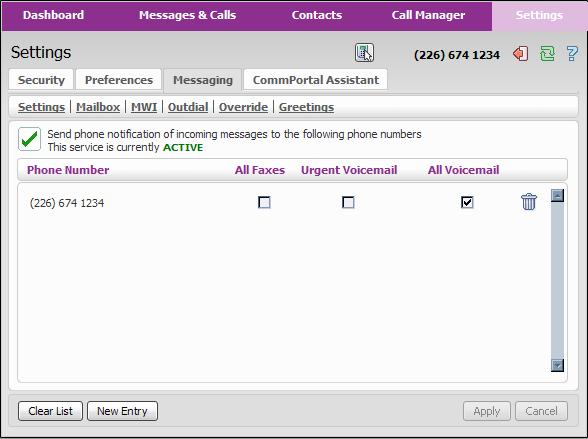
MWI (Message Waiting Indications)
You can enable message indications to different phone numbers. By default your home number is active as the recipient of message indicators, usually a flashing LED on your phone to let you know voice mail is waiting. You can change this so another phone number will flash an indication of messages waiting for your home phone.
Outdial
This feature enables you to configure the voicemail system to call you whenever you receive a new message. You can choose whether you want to be called every time you receive a message, or only when you receive a certain type of message, for example, an urgent voicemail. If you wish, you can prevent outdial notifications being generated at certain times, or on certain days by configuring a notification schedule.

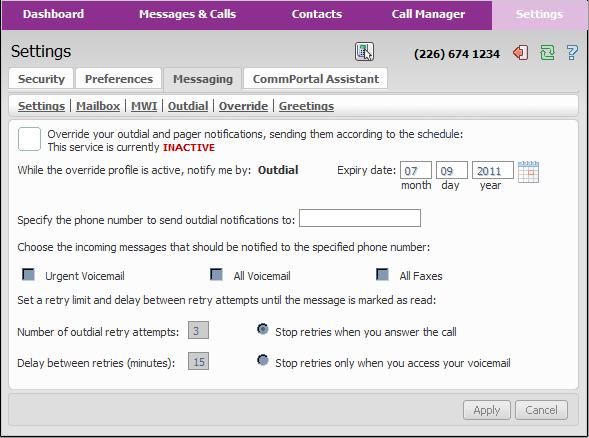
Override
This feature enables you to configure the voicemail system to notify you differently for a period of time. For example, while you are on vacation, you might only want to be notified of urgent messages and you might want to be notified in a different way from normal.
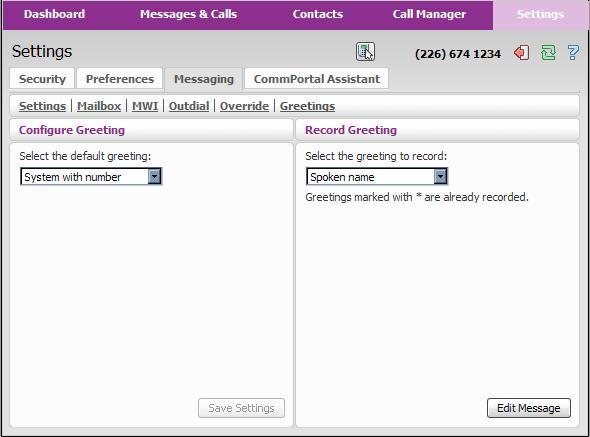
Greetings
This page allows you to configure which greeting will be played to callers who get forwarded to your voicemail. You can choose to either use a standard system greeting, or to record and use a personal message of your choice.
Additional phone features
Call Forwarding - Unconditional
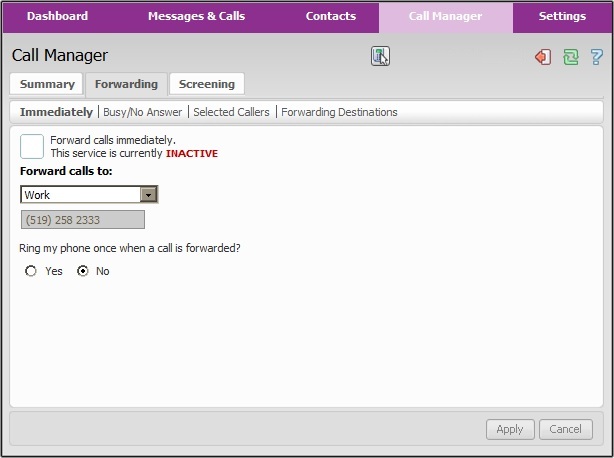
Basic call forwarding will allow all incoming calls to be forwarded to a selected number from your contact list, or a number you input at myphone.mnsi.net
You can toggle forwarding on and off by putting a checkmark in the forward calls immediately box. Red letters indicate no forwarding active, green letters indicate forwarding is currently active. The summary screen will also let you know if forwarding is enabled and where calls are being directed. See the Summary tab in Call Manager
The Forward calls to: drop down menu will be available if you've entered the name and number of a caller in the Forwarding destinations window. If the drop down selection box is not available, a single input box will be available to type one number of your choosing. See Forwarding Destinations section for more information.
Additionally * 7 2 can enable unconditional call forwarding and specify the number to forward to. * 7 3 can be used to turn off call forwarding. To enable call forwarding without myphone.mnsi.net, dial * 7 2, wait for the pulsed dial tone to finish, then dial the 10 digit number to forward to, then hang up. The phone calls are being forwarded to will ring. This must be answered to confirm and complete the Forwarding process (this step is not required if forwarding is done through website). Your phone is now forwarded. To remove the forward, dial * 7 3, this can also remove the forward from your home phone if it was forwarded using myphone.mnsi.net.
Below is an example of how this flow works:
16:03:13 - Line 519-735-xxxx dialed digits *72
16:03:13 - Access code dialed to enable call service: Unconditional call forwarding
16:03:23 - Line 519-735-xxxx dialed digits 519903xxxx
16:03:23 - Initiating courtesy call to verify new call forwarding settings.
16:03:23 - Playing confirmation tone to confirm call forwarding settings.
16:03:24 - Called number doesn't match a local subscriber, so the call may fail or be routed off-switch.
16:03:24 - Sending call request for 519-903-xxxx to another switch
16:03:24 - Received call disconnect from line 519-903-xxxx on another switch
16:03:24 - Sending call request for 519-903-xxxx to another switch
16:03:28 - Line 519-903-xxxx is ringing on another switch
16:03:31 - Line 519-903-xxxx has answered call on another switch
16:03:31 - Call forwarding courtesy call has been answered. Call forwarding configuration is confirmed.
16:03:31 - Subscriber has activated Unconditional call forwarding.
16:03:40 - Received call disconnect from line 519-903-xxxx on another switch
16:03:41 - Line 519-735-xxxx has gone on hook
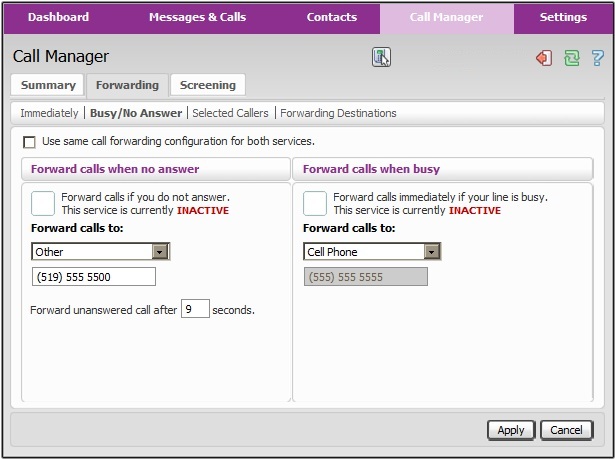
Call Forwarding - Busy/No answer
MNSi includes voice mail by default, unanswered phone calls are forwarded to voice mail after a period of time, or if you line is busy the call is forwarded directly to voice mail. However if you requested to have voice mail service turned off, you can choose where to forward your incoming calls after a period of time or forward your incoming calls when your line is busy. If you do have voice mail service, you must make sure the time before forwarding is set to a lesser value then the voice mail answering time. See the "Settings > Preferences" menu as previously mentioned.
If there is a check mark in the " Use same call forwarding configuration for both services " box, then the forwarding on busy menu will be greyed out and the no answer menu will work for both conditions. The Forward calls to: drop down menu will be available if a forwarding destination has been created. Otherwise just typing the number in input box will work. See " Forwarding Destinations " section for more information.
Delayed Call Forwarding can be enabled with * 9 2 and disabled with * 9 3. Busy call forwarding can be enabled with * 9 0 and disabled with * 9 1. "Busy forwarding" will automatically have the same forward as "no answer forwarding" unless you specify otherwise with * 9 0. To specify a forward dial * 9 2 or * 9 0, wait for the pulsed dial tone to finish then dial the number to forward to, hang up. The forward is complete.
Call Forwarding - Selected Calls
Selective call forwarding allows you to forward a particular incoming caller to a specified number.
You can toggle selective call forwarding on and off by putting a check mark in the " Forward calls immediately if they are from selected callers " red letters indicate no forwarding active, green letters indicate forwarding is currently active. The summary screen will also let you know if forwarding is enable and where calls are being directed.
Selective call forwarding can be enabled with * 6 3 and disabled with * 8 3
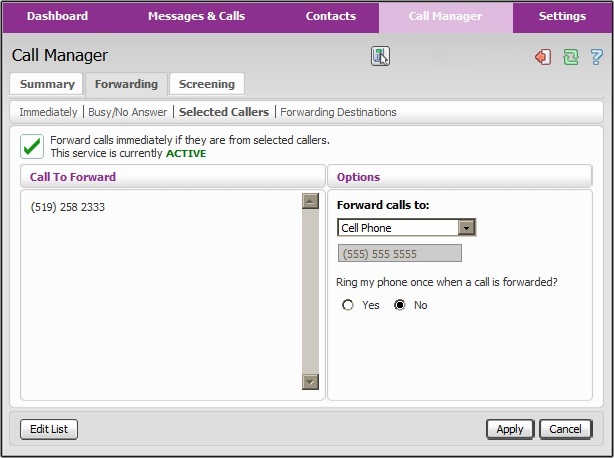
To enter individual phone numbers to forward click the edit button. See next section for details.
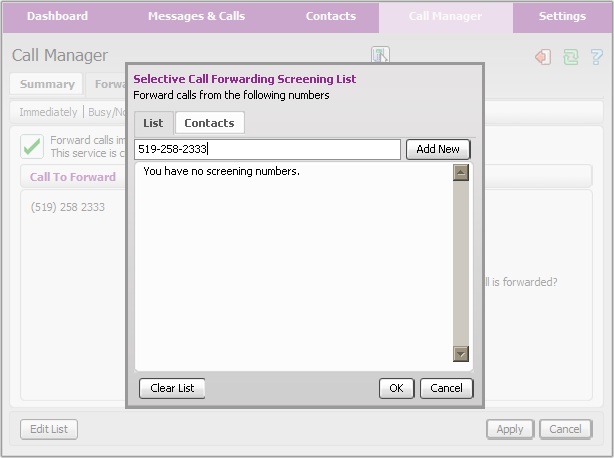
After Clicking edit the screen will display this overlay window and allow for numbers to be input into the system. After the 10 digit number is input into the line, click Add New button and continue adding numbers. Once the list is done being populated click the OK button at the bottom of the window, then click apply to the original window. All the phone numbers in the list will be forwarded to one number only. You cannot map each phone number to a specific destination.
The selective call forwarding feature can be edited and toggled on and off without the use of myphone.mnsi.net web interface by dialing * 6 3. See the menu below
Operator will voice the status of selective call forwarding ( on or off ) The number of entries are voiced The number of forwarded numbers are voiced
- 3 Toggle selective forwarding on / off
- Specify the forward number: Enter the number followed by #
- # Add entry
- Dial the number followed by #
- 0 1 # To add the last calling party
- * Remove entries
- 0 8 * To remove entries
- 0 9 * To remove anonymous entries
- 1 To hear the entry
- 0 7 to remove
- 0 repeat menu
Call Forwarding - Forwarding Destinations
Here you can create an a list of numbers that would appear in the " Forward calls to: ". After typing your name and number into the new destination box you must click apply in order for the settings to remain in the list. To remove an item click the trashcan icon next to your number then hit apply.